With increasing competition in e-commerce, businesses are constantly seeking new ways to leverage data for better decision-making. One powerful approach is analyzing transactional data from payment gateways like Stripe. While Stripe offers insights into online purchase data, a Stripe to Snowflake integration enables businesses to perform in-depth analysis for deeper, actionable insights.
Snowflake, as a robust cloud data warehouse, helps you store your business-critical data like subscriptions and transactions. This helps gain real-time analytics or build superior machine learning models for enhancing decision-making.
In this guide, we’ll explore different methods for connecting Stripe data to Snowflake after a brief overview of both platforms.
What is Stripe?
Founded in 2010, Stripe is a payment processing company that enables businesses to accept payments over the Internet. It caters to companies of all sizes, from startups to large enterprises, as a secure payment solution across various channels. Some of the services Stripe offers include payment processing, recurring billing and subscriptions, and customizable checkout.
Stripe allows businesses to accept payments from customers worldwide with various payment methods, including credit and debit cards, bank transfers, digital wallets, etc. It uses ML and advanced fraud detection mechanisms to ensure secure payment processing with any of these payment options.
You can analyze Stripe data to identify revenue per subscriber, success of email marketing with respect to your new launch, etc.
What is Snowflake?
Developed in 2012, Snowflake is a popular data warehouse designed to work across Amazon Web Services, Microsoft Azure, and Google Cloud Platform. You can use Snowflake to store and analyze data records in a centralized hub with automated scaling of computing resources for loading or analyzing data.
Snowflake has a decoupled architecture, and it automatically allocates the required resources, such as CPU, memory, or IO, for individual workloads. There is no tight coupling on the resources by Snowflake, so it is possible to dynamically change the configurations and scale them according to your needs.
Snowflake is designed as a pay-per-use model. Since you only need to pay for the resources you use, it is a cost-efficient option.
3 Methods for a Stripe to Snowflake Integration
Now, let’s delve into 3 ways to move data from Stripe to Snowflake:
- Method 1: Using the Stripe UI
- Method 2: Using third-party data integration tools like Estuary Flow
- Method 3: Using CSV Export/Import
Method 1: Using the Stripe UI for a Stripe to Snowflake Integration
Prerequisite: You should have an active Snowflake account to perform this UI integration.
You can use Stripe’s built-in feature—Data Pipeline—to connect your account to the Snowflake data warehouse. The steps to follow include:
Step 1: Pick Your Destination Data Warehouse
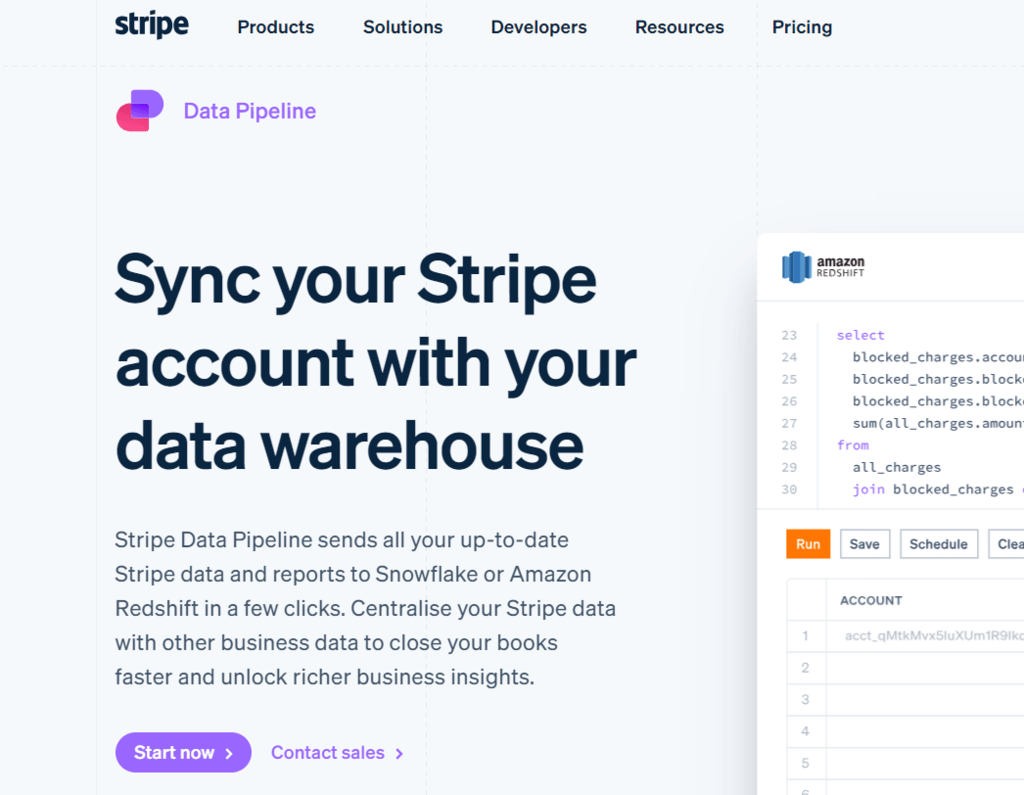
The Stripe Data Pipeline feature allows you to connect your account directly to Snowflake for a Stripe to Snowflake integration or to Amazon Redshift. In this case, you must pick Snowflake as your desired data warehouse. The steps to make this selection are as follows:
- Open the Stripe Data Pipeline webpage, and click on Start Now.
- Register or sign in to your Stripe account.
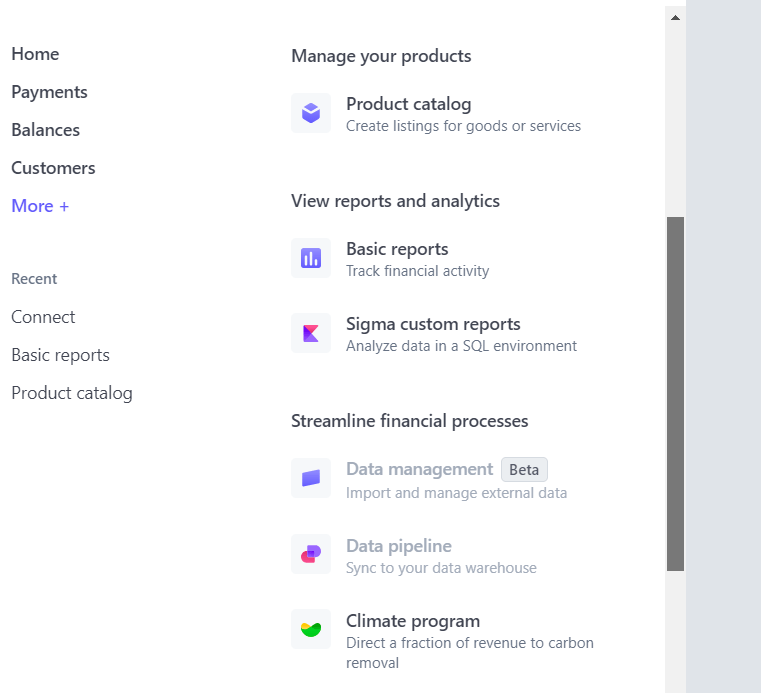
- When you are in your Stripe Dashboard, click on More + from the left-side pane of the navigation bar.
- Scroll down to find Data Pipeline from the given options, and click on it.
- You will now be asked to choose your preferred data warehouse. Select Snowflake from the two options.
Step 2: Connect Your Account
- Enter your Snowflake account details to complete the Stripe to Snowflake integration. Stripe will then securely replicate your data to Snowflake, enabling you to leverage robust analytics.
This method offers a straightforward Stripe to Snowflake integration with minimal setup, ideal for basic data syncing needs.
Method 2: Setting Up a Stripe to Snowflake Data Pipeline with Estuary Flow
To overcome the limitations of manual data integration from Stripe to Snowflake, you can use third-party data pipeline tools like Estuary Flow.
Estuary Flow is a popular data integration platform that comes with real-time ETL (extract, transform, load) capabilities and allows you to create a data pipeline between Stripe Data and Snowflake in two simple steps. It has built-in connectors and an intuitive interface to help you set up the data migration process in just a few minutes.
Before you begin, register for a free account on Estuary Flow, or log in if you already have one. Here’s how to set up the Stripe to Snowflake integration in two steps:
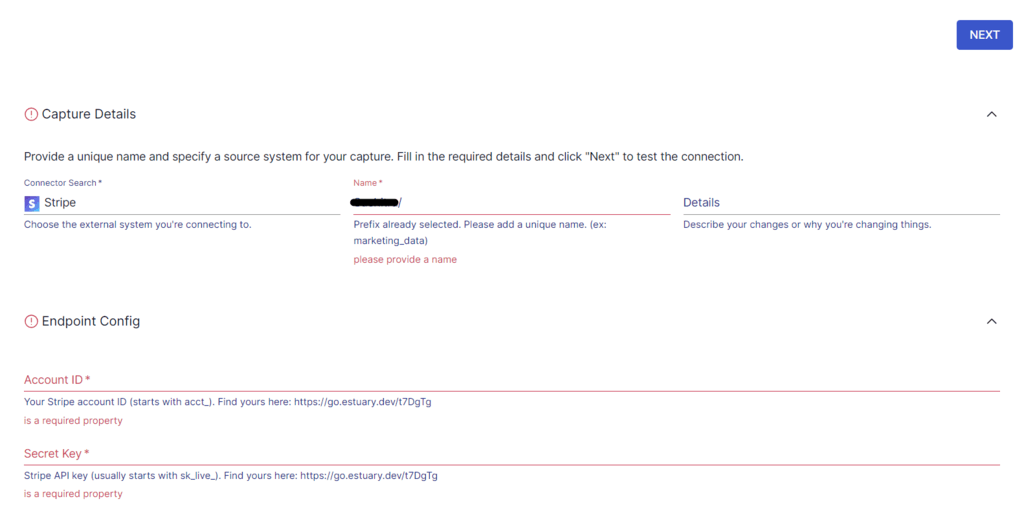
Step 1: Set Stripe as the Data Source
- On the Estuary Flow dashboard, go to Sources in the left navigation bar, and click on + NEW CAPTURE.
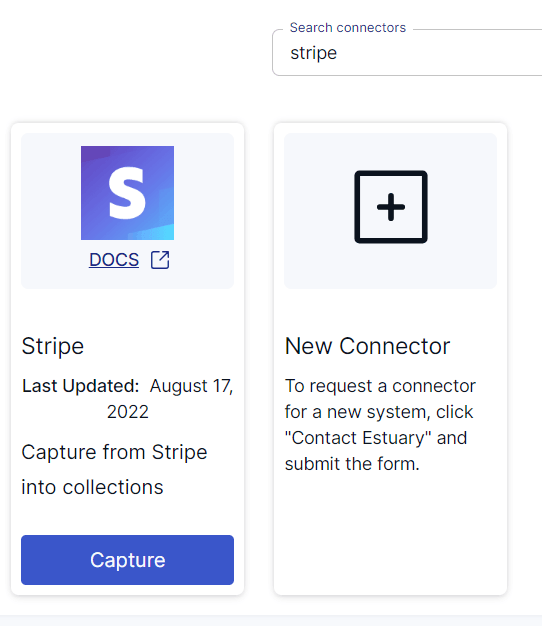
- In the Search connectors box, type "Stripe," and select the Stripe connector from the results. Click on Capture within the Stripe connector option.
- On the connector configuration page, enter the required details, such as Name for the capture, Account ID, and Secret Key.
- Once all details are complete, click on NEXT > Save and Publish. Estuary Flow will capture data from Stripe into Flow collections.
Step 2: Set Up Snowflake as the Destination
- Navigate to Destinations on the dashboard and click on + NEW MATERIALIZATION. Alternatively, select Materialize Connections from the pop-up after a successful capture.
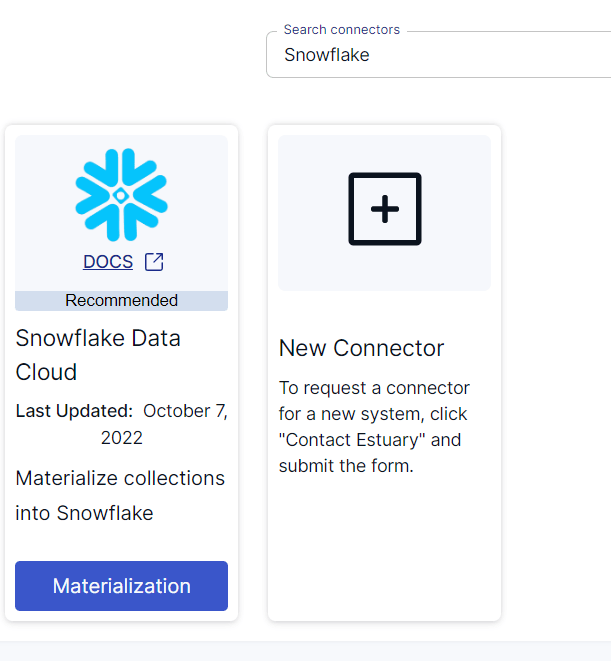
- In the Search connectors box, type "Snowflake," then click on Materialization of the Snowflake connector in the search results.
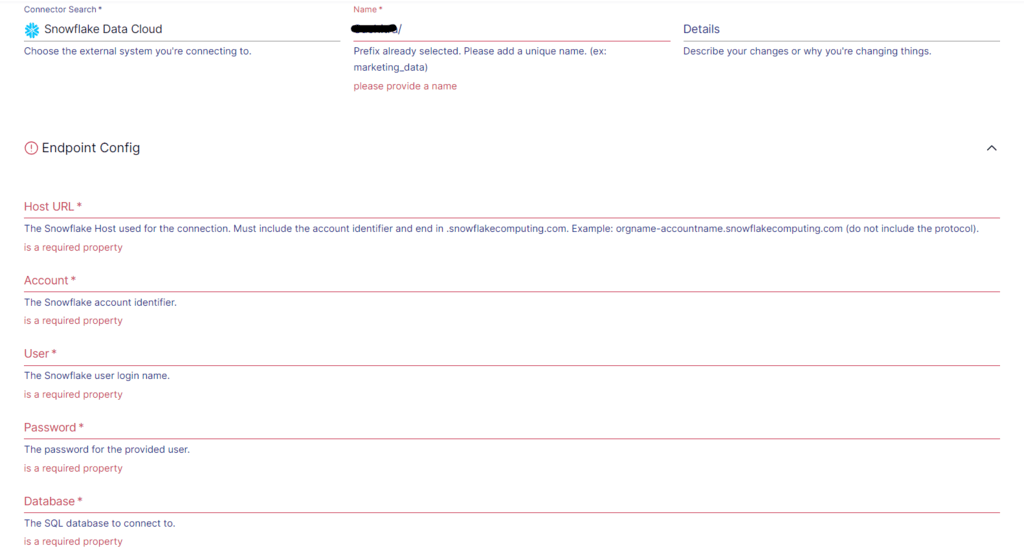
- On the Snowflake connector configuration page, enter a unique Name for the connector, the Host URL, and Account details. If the Stripe data isn’t automatically filled, use the Source Collections section to add it.
- Click on NEXT > Save and Publish to finalize the configuration.
Now, your Stripe to Snowflake data pipeline is set up, and data will transfer from Stripe to Snowflake in real-time, ensuring up-to-date insights.
For more information, refer to the Estuary documentation on setting up:
If you have questions or need support, join our Estuary Slack community! Connect with experts and get real-time assistance to ensure a smooth data integration. Join here.
Method 3: Using CSV Export/Import to Migrate Data from Stripe to Snowflake
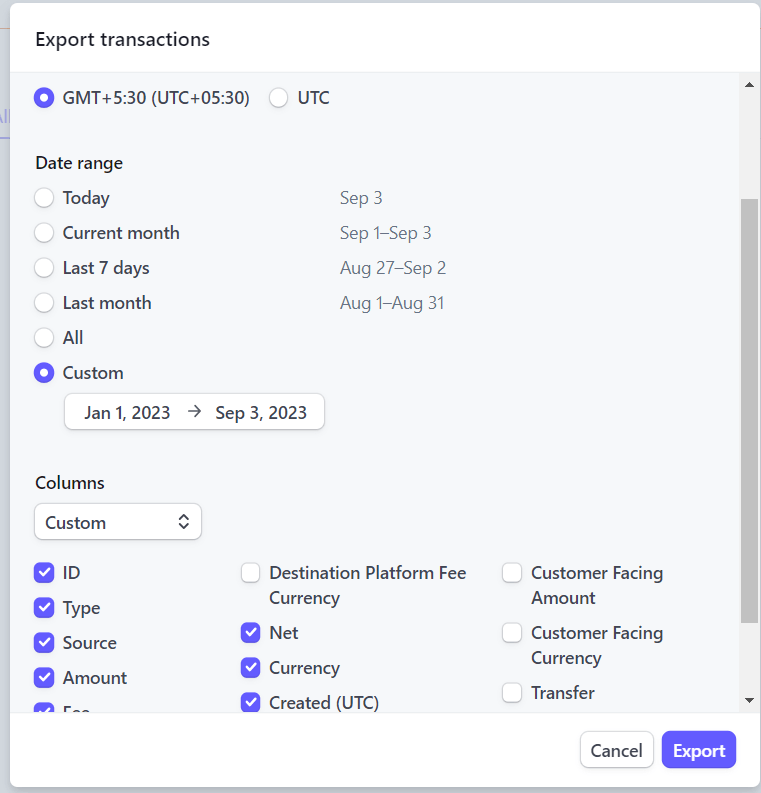
This method involves exporting data from Stripe as CSV files and loading those files to Snowflake. To do this, you must first log in to your Stripe account. From the dashboard, go to the Payments page, and click Export.
Now, you can select your Time zone preference, desired Columns, and Date range. Once done, click on Export at the bottom of the page.
This will download your Stripe data, including the selected payment information, in CSV format.
In the next step, you have to load this CSV file into your Snowflake account to complete the migration process. The steps you need to follow to upload the Stripe data CSV file to Snowflake include:
- Login to your Snowflake account.
- Create a database and select it by using the use statement. The syntax is as follows:
plaintextuse database [database-name];- Create a file format that will describe the data to be loaded into the Snowflake tables. The syntax for creating a file format is as follows:
plaintextCREATE [ OR REPLACE ] FILE FORMAT [IF NOT EXISTS ] <name>
TYPE = {CSV} [formatTypeOptions]
[COMMENT = ‘ ‘]- Use the CREATE statement to create a table. Here is the syntax:
plaintextCREATE [OR REPLACE] TABLE [ IF NOT EXISTS ] <table_name> (
<column_name1> <data_type> [ <column_constraints> ],
<column_name2> <data_type> [ <column_constraints> ],
);- Create a staging area:
plaintextCREATE OR REPLACE STAGE [ IF NOT EXISTS ] <stage_name>- Load the CSV file from your device to Snowflake staging with the following syntax:
plaintextput <path_to_csv_file> @~/stage_name
put file://D:\[csv_file_name].csv @DEMO_DB.PUBLIC.%[database_name]- Copy the loaded CSV data to the target table, which was created in the earlier step. Use the following syntax:
plaintextCOPY INTO <table_name>
FROM
<staging_area>/<csv_filepath>
FILE_FORMAT = (TYPE = CSV)
;
copy into [database_name]
from @%[database_name]
file_format= (format_name= ‘my_csv_format’,
error_on_column_count_mismatch= false)
pattern= ‘.*[csv_file_name].csv.gz’
on_error= ‘skip_file’;- Run a select query to verify if the CSV data is loaded to the target table:
plaintextselect * from table_name;This wraps up the Stripe to Snowflake integration process. With these steps completed, your data is now ready for querying within Snowflake.
Final Thoughts
Implementing a Stripe to Snowflake integration can empower your business with timely insights into payments and customer behavior, essential for data-driven decision-making. Analyzing crucial data like payments received, subscriptions sold, and pending dues can significantly enhance your operational efficiency and customer strategy.
To move data from Stripe to Snowflake, you have three primary options: the Stripe UI, third-party data integration tools, and CSV export/import. While the Stripe UI offers a simple setup, its support is limited to certain Snowflake instances on AWS and lacks real-time data access, with data updates every six hours. The CSV method, meanwhile, is time-consuming and doesn’t support automation or real-time capabilities.
For a seamless, real-time integration, third-party platforms like Estuary Flow provide the most efficient solution. With Estuary Flow, you can set up a data pipeline between Stripe and Snowflake in just two steps:
- Step 1: Set Stripe as the Data Source
- Step 2: Set Up Snowflake as the Destination
Estuary Flow supports real-time data transfers between Stripe to Snowflake, helping maintain up-to-date data in the warehouse for time-critical insights.
You can use the in-built connectors of Estuary Flow to set up a real-time data pipeline between any source and destination for seamless migration of data. So, register for free today to try it out yourself!

About the author
With over 15 years in data engineering, a seasoned expert in driving growth for early-stage data companies, focusing on strategies that attract customers and users. Extensive writing provides insights to help companies scale efficiently and effectively in an evolving data landscape.
Popular Articles


