When you hear "change data capture," you typically think of databases. It's rare to hear this term used for a SaaS app. But Salesforce is no ordinary SaaS app. In this guide, we'll walk you through all things Salesforce change data capture:
- Why it matters (if you don't already know!)
- A walkthrough of the technical considerations you'll need to account for to build a Salesforce CDC pipeline.
- A super-quick, but just as effective, tool that does the heavy lifting for you, with step-by-step instructions.
Looking for something else? Check out our CDC Guides for other systems:
What is Salesforce?
If you haven’t heard of Salesforce then you must have been living under an extremely large metaphorical rock for the past quarter century.
Since its inception in 1999, Salesforce has fully established itself as the cloud-based customer relationship management (CRM) platform globally. It has revolutionized how companies interact with their customers, as well as helping businesses of all sizes to streamline sales, marketing, and analytics.
Salesforce offers a suite of tools that help businesses:
- Track their sales activities
- Manage their customer interactions
- Automate their marketing campaigns
- Analyze their performance data
...among other things. It's also got a user-friendly interface and is highly customizable.
With all that in mind, it's no wonder Salesforce has become the de-facto CRM platform in the world.
But one of the most powerful (and least discussed) features it offers is change data capture. Naturally, users of Salesforce produce a lot of data, which can exist in a complex ecosystem of different products. To derive the most benefit it is very important to ensure that the data can be monitored and actioned in near real-time.
This could be important for events such as the creation, update, or deletion of records, and streaming those changes to subscribers; Change Data Capture is therefore particularly useful for:
- Integrating Salesforce with external systems.
- Maintaining data consistency across multiple applications.
- Building event-driven architectures.
What is Salesforce Change Data Capture (CDC)?
Salesforce CDC is a method for tracking changes made to your Salesforce data in near real-time. This allows you to keep other systems up-to-date whenever something changes in Salesforce, such as creating a new lead or updating a contact.
Salesforce Change Data Capture supports many features that make it a powerful tool for enhancing your Salesforce ecosystem. Some of the key features are outlined below:
Event-driven architecture: Change Data Capture is based on an event-driven model, where change events are generated whenever records are created, updated, deleted, or undeleted in Salesforce. Subscribers can listen to these change events and take appropriate actions based on the captured data.
Real-time data synchronization: Change Data Capture allows you to synchronize your Salesforce data with external systems in near real-time, ensuring that all connected applications have the latest and most accurate data.
Comprehensive change information: Change events include detailed information about the changes made, such as the type of operation (create, update, delete, undelete), the record's field values before and after the change, and the event timestamp. This information helps you to process the changes effectively and maintain data consistency.
Scalability and performance: Change Data Capture is designed to handle high volumes of data changes and deliver those changes to subscribers with low latency. It leverages the multiple real-time data APIS, which ensure efficient and scalable event streaming.
Easy integration with external systems: Possibly the biggest benefit of Change Data Capture is that the events can be consumed by various types of subscribers. This makes it easy to integrate Salesforce with other applications, such as databases, data warehouses, or custom-built applications. This means that you can use CDC as part of a wider architecture or application ecosystem with ease.
Overall, this robust feature set provides an event feed that's far more sophisticated than most SaaS platforms, and sets it squarely in the realm of true, real-time CDC along with major RDBMS like Postgres and SQL Server.
Build a Salesforce CDC Pipeline: DIY Guide
If you’re an impatient engineer, you probably skipped the first two sections of this article to get straight into the meat of the article, so if this is you then welcome!
We'll now explain how you can set up Salesforce CDC to enable you to track changes in your Salesforce data and integrate it with external systems.
This is a loose choose-your-own-adventure style guide that'll help you build your own CDC pipeline, which is a very attainable goal, but does require some engineering chops!
The steps required are as follows:
Step 1 - Enable Change Data Capture:
To enable change data capture in Salesforce follow these steps:
a. Log in to your Salesforce account.
b. Click on the gear icon at the top right corner and select "Setup."
c. In the Quick Find box, type "Change Data Capture" and select it from the search results.
d. In the Change Data Capture setup page, you'll see a list of available objects. Choose the standard or custom objects you want to track changes for by moving them from the "Available Entities" list to the "Selected Entities" list.
e. Click "Save" to enable Change Data Capture for the selected objects.
Step 2 - Subscribe to Change Events:
You can subscribe to the change events in CDC in several ways. Depending on your use case, you can subscribe to change events using Apex Triggers, Process Builder, or an external system via the Streaming API.
a. Apex Triggers: Apex triggers are custom pieces of code in Salesforce, written in the Apex programming language, that respond to specific events (i.e. events in CDC). To create an Apex trigger that listens to change events, create a new Apex class with the 'trigger' keyword and implement the logic to handle the incoming events.
An example of an Apex trigger can be seen below:
plaintexttrigger UpdateContactInfo on Account (after update) {
    for (Account updatedAccount : Trigger.New) {
        // Custom logic to update related Contact records based on changes in the Account record
    }
}
In this example, the trigger is associated with the Account object and responds to the 'after update' event. When an Account record is updated, the trigger executes and processes the custom logic defined within the trigger.
b. Process Builder: If you are less technically minded and want to use a no-code solution then Process Builder is for you. Process Builder is a visual workflow automation tool with a user-friendly interface that uses a point-and-click approach, making it easy for users to create processes by dragging and dropping elements onto the canvas.
In the Process Builder, create a new process and select "Change Data Capture" as the process's starting condition. Choose the object you enabled in Step 1, and define the criteria and actions to be taken when a change event is detected.
c. External Systems (Streaming API): If you want to subscribe to change events from an external system, you can use the Salesforce Streaming API (the documentation can be found here). You can use tools like CometD, a scalable HTTP-based event routing bus, to create a client that subscribes to change events and processes them accordingly. Make sure to authenticate your client with Salesforce using OAuth 2.0.
Step 3 - Process Change Events
Once you have subscribed to change events, the next thing you will want to achieve is actually processing these change events. This is unfortunately where we can’t help you without knowing your exact use case!
Change events contain information about the data change, such as the operation type, record field values before and after the change, and the event timestamp. You can use this information to maintain data consistency between Salesforce and external systems or trigger additional workflows based on the changes.
To help we will provide some examples of things you could do with the CDC information:
Data warehousing and analytics: CDC can be used to keep a data warehouse up-to-date with the latest changes in Salesforce data. As changes occur in Salesforce, the data warehouse can subscribe to the change events and update its records accordingly.
Auditing and compliance: CDC can be used to implement auditing and compliance solutions by capturing changes to sensitive data in Salesforce and storing them in an audit log.
Real-time notifications and alerts: You can implement custom logic to evaluate the changes and trigger notifications to relevant stakeholders. For example, when a high-value opportunity is closed, you can use CDC to capture the change event and send a real-time notification to the sales manager to congratulate the sales rep or take further action.
Step 4 - Monitor and Troubleshoot
Like any context, it is important to implement engineering best practices throughout. As such it is essential to monitor your Change Data Capture implementation to ensure it's working as expected.
You can use the monitoring tools available in Salesforce, like the Event Monitoring feature or the Streaming API dashboard, to track the performance and health of your change event subscriptions. You can then keep an eye on error logs (or process these in an automated way) and address any issues that arise during the data synchronization process.
Limitations of the Custom-Code Approach for Salesforce CDC
While Salesforce's native CDC can be a powerful tool for tracking changes made to records in real time, as you've probably noted, it has some limitations.
- While steps 1 and 2 above (the part where we set up Salesforce CDC and subscribe to change events) are pretty straightforward, the rest is not. It's up to you to write the changes to a target destination, which can be complex to implement without additional tools to help. It involves writing a lot of custom code.
Of course, capturing the changes alone isn’t useful; the value of CDC is in how you use the data in your target. - Data Storage Limitations: Salesforce CDC stores the change data in a database table, which can quickly become large and consume significant storage space. You need to monitor their data storage usage and plan for additional storage as needed.
- API Limits: Salesforce has API limits, and CDC uses API requests to retrieve changes. You need to consider these API limits and plan accordingly to avoid hitting API limits and service interruptions.
- Complexity of Implementing: Implementing Salesforce CDC requires some technical expertise and knowledge of Salesforce's API. Some development teams have the necessary skills to implement and maintain CDC successfully, but this can be a limiting factor for some!
- Limitations of Supported Objects: Not all Salesforce objects support CDC, and some fields may not be supported for tracking. You need to review the objects and fields they want to track and ensure they are supported by CDC.
- Limited Historical Data: CDC only captures changes made after it is enabled, so historical data is not captured. You need to consider this limitation when implementing CDC and plan for any reporting needs that require historical data.
While Salesforce CDC can be a valuable tool for tracking changes made to records, it is essential to consider these limitations and plan accordingly.
Maybe these limits aren't show-stopping for your use case, but if they are, we've got your solution.
Set up a Salesforce CDC with Estuary Flow
First, a quick introduction for anyone who's new here.
We're Estuary, and this is our blog (👋).
We provide Flow, a low-code UI platform that streamlines the creation and maintenance of data pipelines, ingesting and transforming data in real time from a data source to a target using pre-built connectors.
In other words, Estuary provides a no-code path to move data with CDC from Salesforce directly to a variety of destinations.
For any curious engineers, you can read about:
- The streaming infrastructure that forms the foundation of Flow.
- How our Salesforce data capture connectors work.
Step 1 - Capture the data from Salesforce
Sign into your Estuary account or sign up for free.
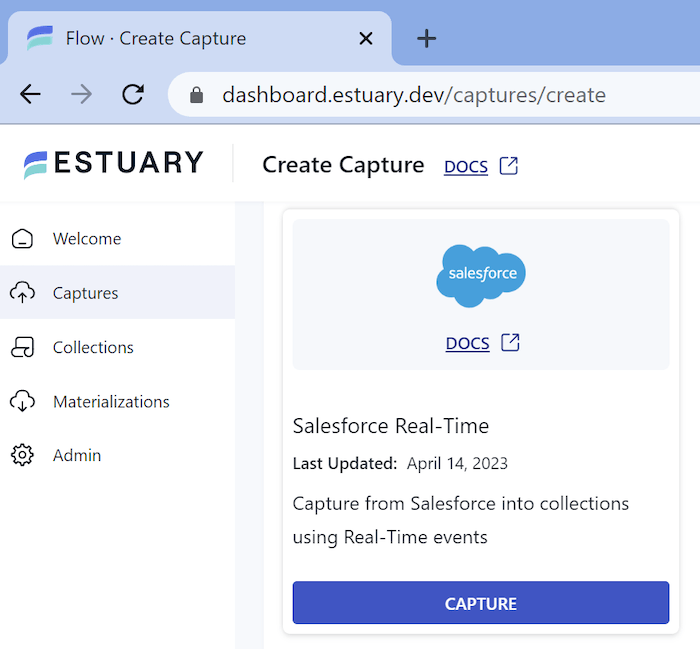
In Estuary Flow, navigate to the Captures page, search for the Salesforce Real Time connector, and click Capture.
NOTE: We have a separate connector to capture all your historical Salesforce data. It's just called "Salesforce."
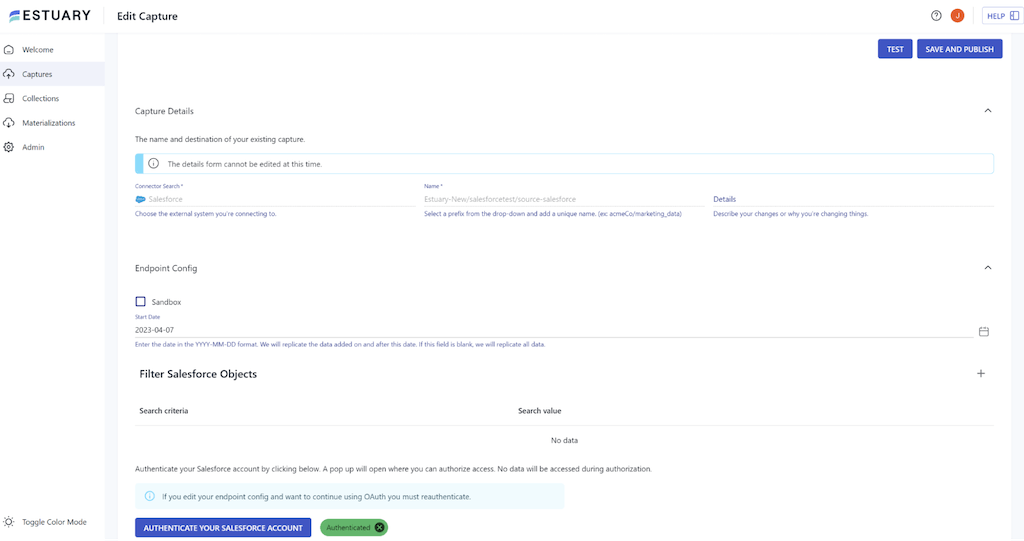
Give the capture a name. Authenticate with OAuth in one click:
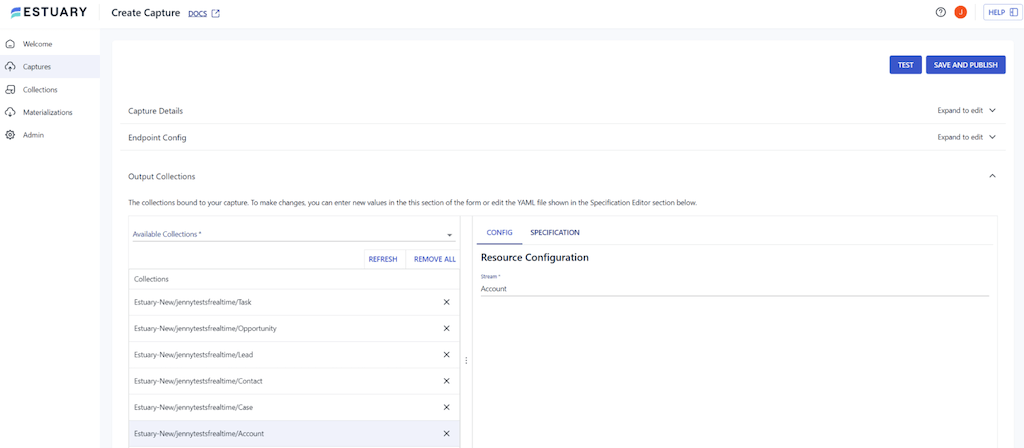
After clicking Next, the list of data collections (representing data objects in Salesforce) that Estuary Flow discovers in your Salesforce account will automatically populate.
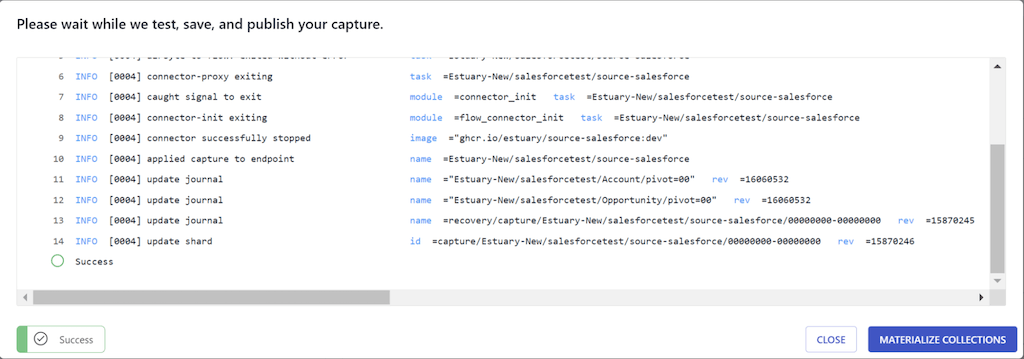
Click Save and Publish:
Step 2 - Move Salesforce data to a destination system
You can do this either through the post-capture pop-up by clicking Materialize Collections:
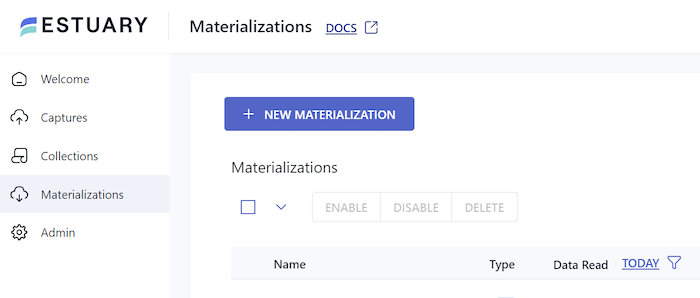
Or, from the Materializations page - click New Materialization:
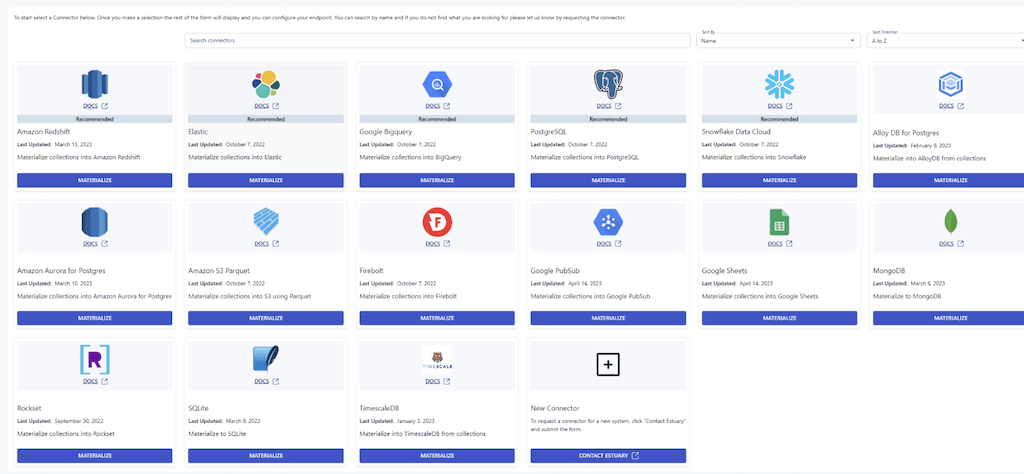
Now, pick your destination system (Snowflake, BigQuery, Redshift, or somewhere else...)
The steps vary slightly depending on the destination. But you can use the in-app docs for help. Overall, the process is similar to setting up a capture, as you did above.
Once you publish your materialization, new data will stream from Salesforce to your destination in real time.
Regardless of how you set it up, CDC is a highly powerful feature of Salesforce and should certainly be a part of your ecosystem to maximize the capability of your business to make sales in the most efficient manner possible.
We hope you have everything you need to get started (including your free Flow trial — you can start with no credit card).
To chat more about Salesforce CDC (and how we’re solving other engineering problems at Estuary) join us on Slack.

About the author
With over 15 years in data engineering, a seasoned expert in driving growth for early-stage data companies, focusing on strategies that attract customers and users. Extensive writing provides insights to help companies scale efficiently and effectively in an evolving data landscape.
Popular Articles


