Jira to Redshift Integration (& How to Move Your Data Instantly)
Optimize Jira data with seamless Jira to Redshift integration. Unlock insights, track projects, and drive decisions. Explore 2 approaches: manual Rest API scripts or fully automated migration. Your guide to seamless data transfer.

If you’re looking for ways to set up Jira to Amazon Redshift integration, you’ve come to the right place. Jira, which is a popular project management tool, holds valuable project data. Connecting it with Redshift, a robust data warehousing solution, can help you efficiently handle massive Jira datasets and execute complex queries. By integrating these two platforms, you can unlock valuable insights, optimize project tracking, and enable data-driven decision-making.
In this article, you will find two approaches that walk you through the process of transferring data from Jira to Redshift. In one, you have the option to manually write scripts using Rest API; in the other, you can fully automate the migration process.
Introduction to Jira
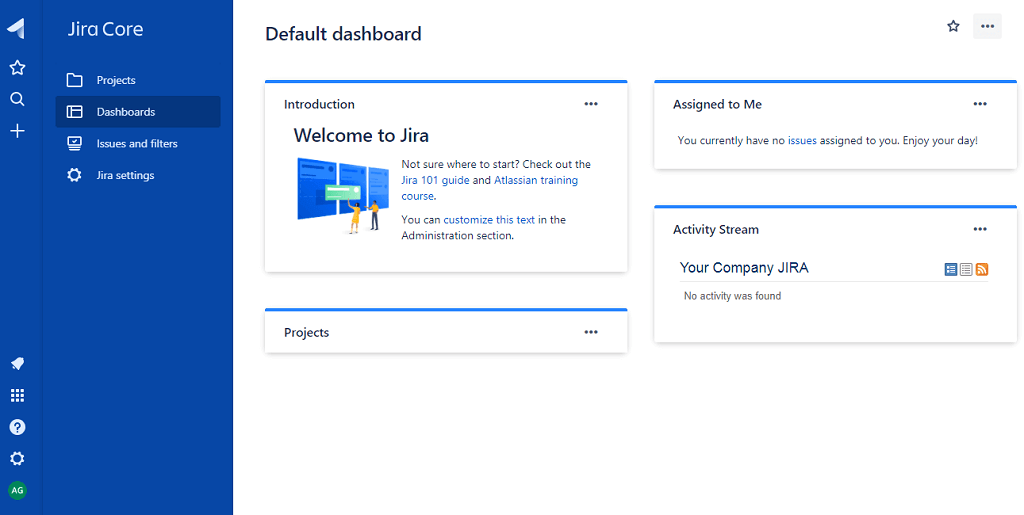
Developed by Atlassian, Jira is a popular project management and issue-tracking software. It is commonly used by development and testing teams to plan, track, and manage their projects and tasks. With its user-friendly interface and powerful features, Jira helps teams collaborate effectively and streamline their workflows. Jira supports Agile project management methodologies, enabling teams to create user stories and tasks and organize them using customizable boards. This flexibility allows teams to adapt to different project requirements and work in an iterative and incremental way. Jira offers a wide range of templates to suit different project types and requirements. It also provides analytics dashboards and reports to gain insights into project progress and performance. These reporting and visualization features allow teams to make data-driven decisions and improve overall efficiency.
Introduction to Amazon Redshift
Developed by Amazon Web Services, Redshift is a data warehousing solution that allows you to execute complex queries and analytics on massive datasets. The columnar data storage architecture of Amazon Redshift sets it apart from traditional row-based databases. This format enables the database to process the necessary columns for a query, reducing I/O overhead and improving overall query performance. Redshift also leverages Massively Parallel Processing architecture, where data and query processing are distributed across multiple nodes in a cluster. This architecture allows Redshift to handle complex analytical workflows on large datasets with high scalability and performance.
2 Ways to Load Data From Jira to Redshift
- The Easy Way: Connect Jira to Amazon Redshift using real-time ETL tools
- The Manual Approach: Load Jira data to Redshift using REST API
The Easy Way: Load Data From Jira to Amazon Redshift Using Real-Time ETL Tools Like Estuary
Estuary Flow stands out as the proven no-code extract, transform, load (ETL) tool that streamlines the data capturing and migration process. With its wide range of built-in connectors, you can seamlessly connect to various sources and destinations without writing complicated scripts.
Flow enables near real-time data integration and synchronization, capturing updates and replicating them in the target system. This ensures that the target system stays up-to-date with the source system, providing timely and accurate insights.
Here’s how you can go about using Estuary Flow to load data from Jira to Amazon Redshift:
Step 1: Configure Jira as Source
- Log in to your Estuary account.
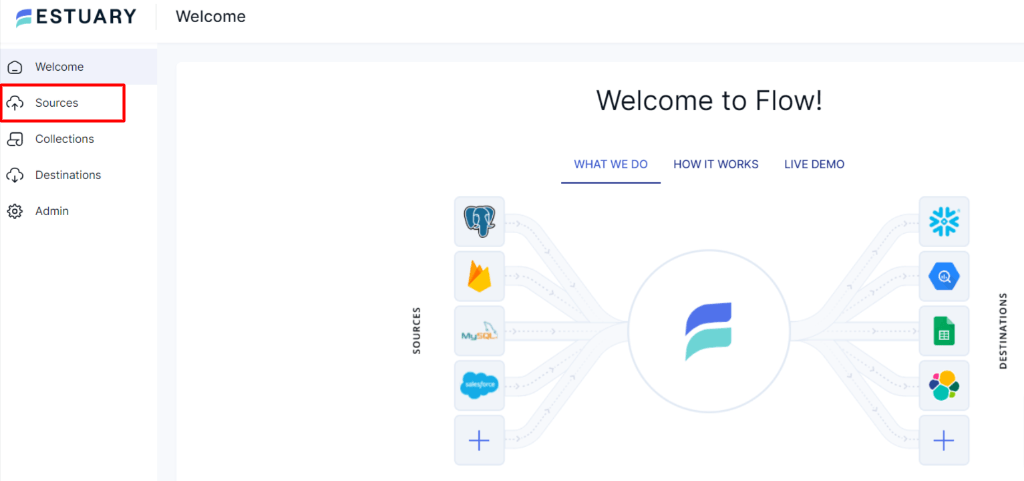
- Once logged in, you’ll be directed to Estuary’s dashboard. To set up the source of the data pipeline, click on Sources, located on the left-side pane of the dashboard.
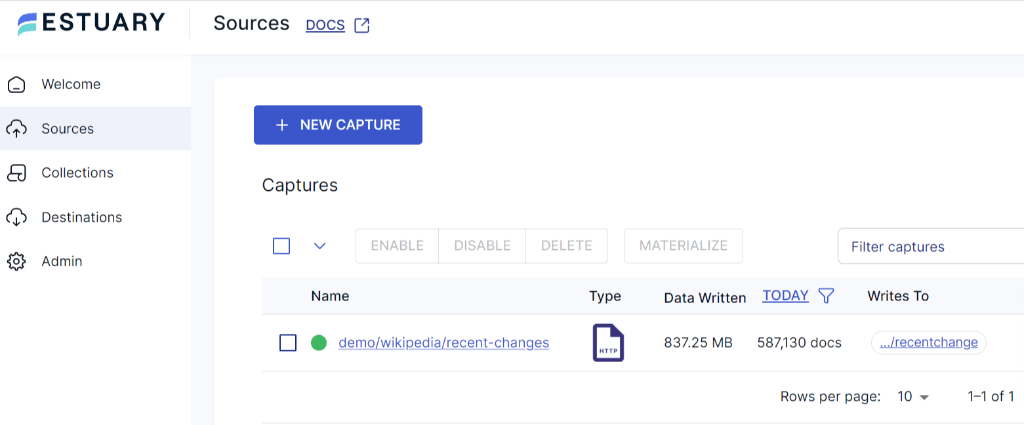
- On the Sources page, click on the + New Capture button. You’ll be directed to the Create Capture page.
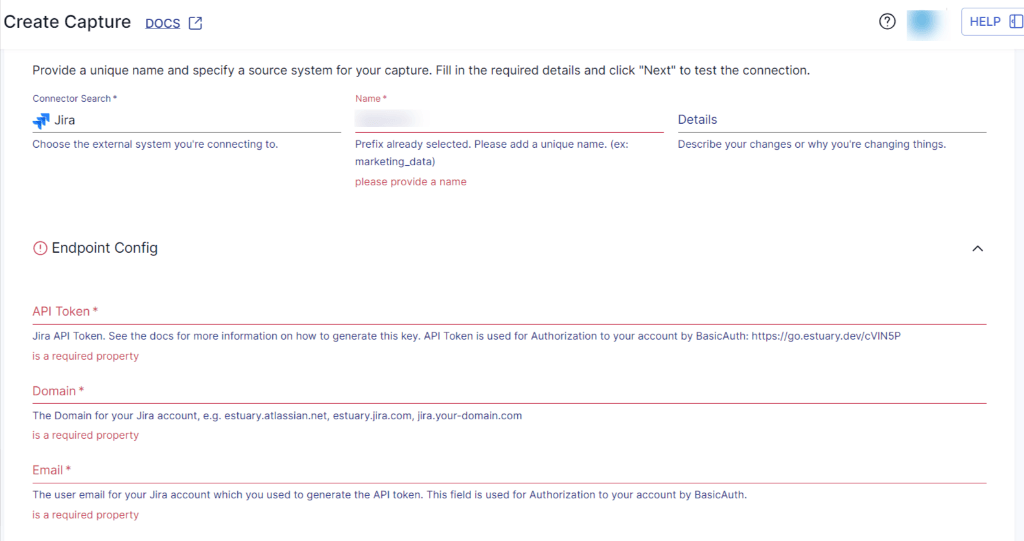
- On the Create Capture page, search for the Jira connector in the Search Connector box. Click on the Capture button.
- On the Jira connector page, enter a Name for the connector and the endpoint config details, such as API Token, Domain, and Email. After completing the required information, proceed by clicking on Next > Save and Publish.
Step 2: Configure Amazon Redshift as Destination
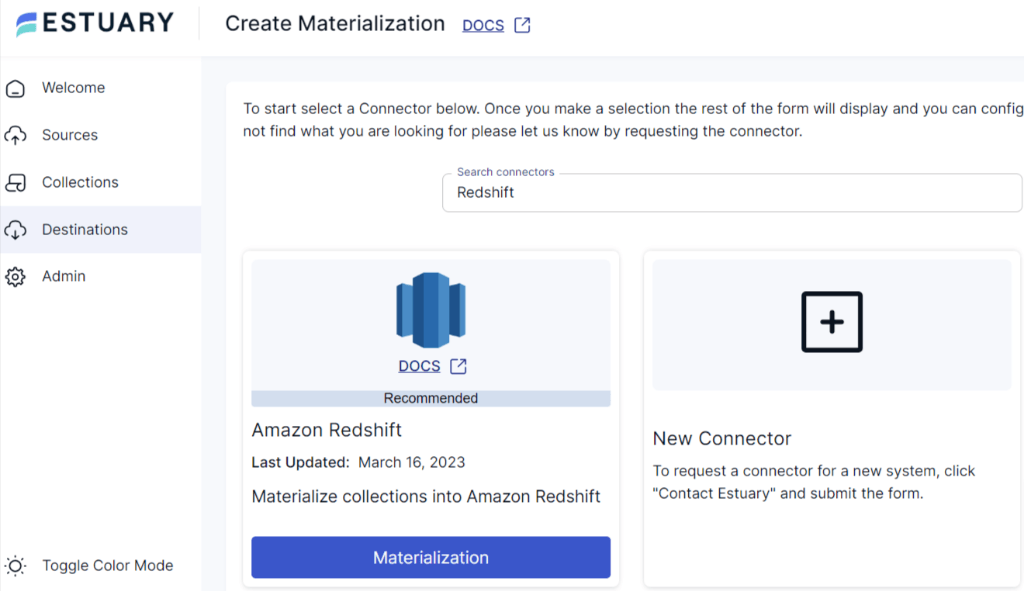
- Following that, you will need to set up the data destination. To accomplish this, navigate to the left-side pane on the Estuary dashboard, choose Destinations, and click the + New Materialization button.
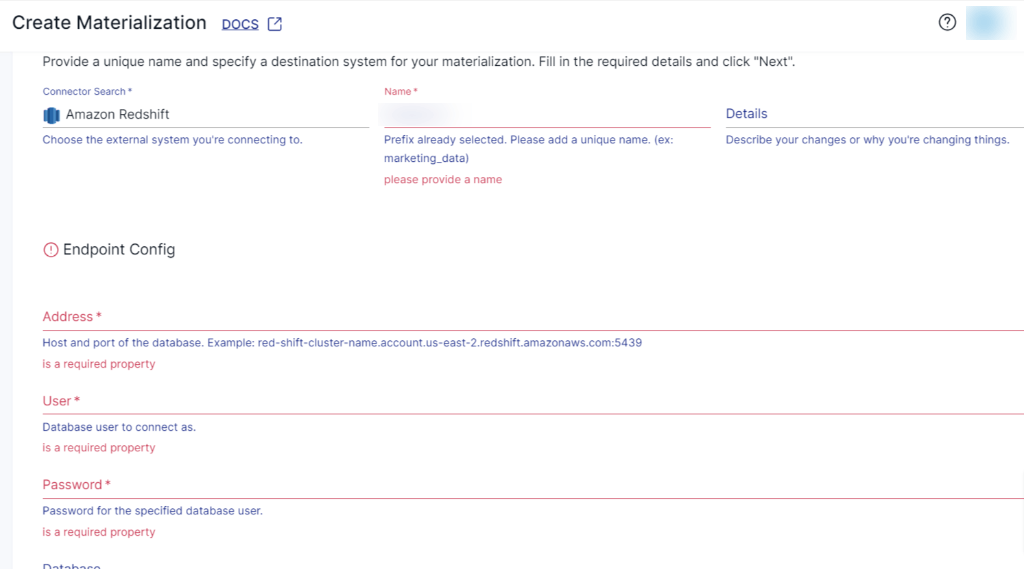
- As you’re integrating Jira to Redshift, search for Redshift in the Search Connector box and then click on the Materialization button. This step will take you to the Redshift materialization page.
- Provide the Materialization name and Endpoint config details, such as database username, Password, and Host address. Click on Next, followed by Save and Publish.
After Estuary verifies your details, you’ll get a successful confirmation screen.
With these two steps, you’ve successfully established a connection between Jira and Amazon Redshift.
For detailed information on creating an end-to-end Data Flow, see Estuary's documentation:
The Manual Approach: Load Data From Jira to Redshift Using REST API
For replicating data from Jira to Amazon Redshift using Jira REST API, you’ll need to ensure the following prerequisites:
- Jira Account and API Access.
- An AWS account to set up the Amazon Redshift cluster and create an Amazon S3 bucket.
Jira to Redshift migration involves several steps. Let’s look at the step-by-step process to replicate your data to Redshift:
Step1: Extract Data from Jira
- Use Jira’s REST API to extract the data you need. The API provides endpoints to retrieve various types of Jira data, such as comments, attachments, issues, and more. You can refer to the Jira REST API documentation for more details on the available endpoints and parameters.
- To interact with the API and fetch the data, you can use programming languages like Python, Java or tools like Postman. Install the necessary libraries to interact with Jira’s API. Make sure to write the code to save the extracted data into the file format accepted by Redshift, i.e., CSV, JSON, Avro, or Parquet files.
Step 2: Set up Redshift Cluster and Create Redshift Tables
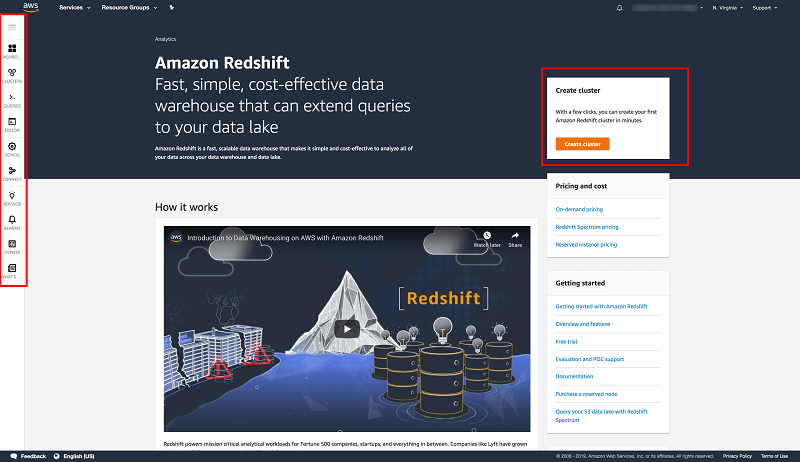
- In the AWS Management Console, go to the Redshift service. Click on Create Cluster to start the cluster creation process. Choose the appropriate region where you want to deploy the Redshift cluster and cluster type based on your workload requirements. Make sure the cluster is configured correctly with the desired security settings.
- Click on the cluster you’ve created, or if you’re using the existing one, click the Connect button to get connection details.
- Decide the schema for your Redshift tables based on the data from Jira. Choose the column names, data types, and relationships between keys.
- Use a SQL client tool like SQL Workbench, or pgAdmin to connect to the Redshift cluster using the provided connection details. In the SQL client, execute SQL statements to create necessary tables in your Redshift cluster.
- Depending on the Redshift schema, you might need to transform the extracted data. Ensure the data quality before loading it into the Redshift tables.
Step 3: Load Data into Amazon Redshift
There are several ways to load data into Amazon Redshift. One of them is to store your extracted data in Amazon S3 and use COPY command to load it in Redshift. Amazon S3 (Simple Storage Service) is a cloud-based storage service by Amazon that securely stores and retrieves data as objects. These objects can be images, videos, documents, or any other data type. Each object is identified by a unique key within a bucket. Check the image below for a comprehensive understanding of the overall process.
- Create an Amazon S3 bucket. To create an S3 bucket, navigate to the Amazon S3 service in the AWS management console.
- Click on Create Bucket, choose a unique name for your bucket, and select the region where you want to store the data. Define the appropriate access control settings for your S3 bucket. You can manage access permissions through AWS IAM policies to control who can read or write data to the bucket.
- Now store the extracted and transformed Jira data in the S3 bucket. To keep data organized, you can create folders within S3 buckets to categorize different datasets of your data.
- This can be done using AWS console, AWS SDKs, or AWS CLI. If you’re comfortable using console and SDKs, follow this guide to move data into the S3 bucket. However, if you’re using AWS CLI, use the aws s3 cp or aws s3 sync command. Choose the appropriate command based on whether you want to upload a single file or a directory. Here’s the syntax to upload data to Amazon S3:
- To upload a single file:
plaintextaws s3 cp /path/to/local/file s3://bucket-name/destination/folder/- To sync a directory:
plaintextaws s3 sync /path/to/local/directory s3://bucket-name/destination/folder/Replace the file or directory path with the extracted file path stored in the local machine (followed in Step 1). Change the bucket-name and destination with your S3 bucket name and path.
- Once the data is uploaded to Amazon S3, use the COPY FROM command in Amazon Redshift to load the data from S3 into the Redshift tables. Here’s the code:
plaintextCOPY table_name
FROM 's3://bucket-name/destination/folder/file'
IAM_ROLE 'iam-role-arn'
CSV DELIMITER ',';
Replace the table_name with the Redshift table name, S3 bucket name and path, and IAM role with your AWS credentials. Adjust the delimiter based on your CSV file format.
- If you need to keep the data in Redshift up-to-date, set up a schedule to periodically run the data loading process. You can use AWS Data Pipeline to automate the data loading.
- With these steps, you’ve completed the Jira to Amazon Redshift Integration.
Limitations of Using Custom Scripts
Using Jira’s REST API to extract data and load it into Amazon Redshift has some limitations:
- Time-Consuming: The overall process requires you to write the logic for data extraction, transformation and then load it using any data-loading approach. Furthermore, maintaining and updating the logic for data extraction and transformation may demand continuous efforts.
- Data Inconsistencies: If there are frequent changes to the data schema in Jira, it can lead to data inconsistency and mapping issues. This can result in data loading errors or incorrect data insertion. To ensure data integrity and accuracy, you would need to perform thorough testing and validation after each schema change.
Conclusion
So far, you’ve learned two methods to copy data from Jira to Amazon Redshift tables. The manual demands proficiency in programming languages and familiarity with AWS tools. Despite offering flexibility and customization for managing smaller datasets, it can become time-consuming due to manual coding and data handling efforts.
Data integration platforms like Estuary offer a streamlined approach for data transfer from Jira to Redshift. Estuary Flow automates the process and provides a user-friendly platform that allows you to set up a robust data pipeline in minutes.
Try Estuary Flow to efficiently replicate data from Jira to Redshift. Build your first pipeline for free today!

About the author
With over 15 years in data engineering, a seasoned expert in driving growth for early-stage data companies, focusing on strategies that attract customers and users. Extensive writing provides insights to help companies scale efficiently and effectively in an evolving data landscape.
Popular Articles


