DynamoDB is known for its scalability and flexibility in handling massive datasets while Snowflake excels in providing a robust analytical environment. By seamlessly integrating these platforms together, you can streamline data analysis, making it that much easier to make informed decisions.
If you’re looking to learn more about how to migrate DynamoDB data to Snowflake, you’ve come to the right place. This guide provides a brief overview of both platforms along with three distinct methods for completing the data migration process:
- Manually transferring data from DynamoDB to Snowflake
- Using DynamoDB Streams
- Using powerful data pipeline tools
With that in mind, let’s dive into a step-by-step process for each of these approaches to help you find the best fit to seamlessly migrate your data between the two platforms.
What Is DynamoDB? An Overview
Amazon DynamoDB is a NoSQL database designed to seamlessly store and retrieve data. With its schemaless design, DynamoDB accommodates structured and semi-structured data while ensuring low-latency access and high availability. This enables you to efficiently manage diverse data types.
To capture data in real time, DynamoDB offers Streams that provide a time-ordered sequence of changes to data items. This feature allows you to track changes and trigger actions in response to updates. By using Streams, you can implement an event-driven architecture, synchronize data, and enable real-time analytics.
What Is Snowflake? An Overview
Snowflake is a powerful cloud-based data warehouse that allows you to seamlessly store, access, and retrieve data. You can use ANSI SQL and advanced SQL with Snowflake to efficiently handle a wide range of structured and semi-structured data types. This helps you conduct in-depth analysis, achieve deeper insights, and make data-driven decisions.
These features are driven by Snowflake’s internal and external stages, which play a vital role in data management. Internal stages are used for loading data from local systems. On the other hand, external stages provide a means to access data from cloud-based storage (like S3) and load it directly into the Snowflake table. These stages streamline data migration, making it easier to load and manipulate data within Snowflake.
3 Methods to Move Data from DynamoDB to Snowflake
- Method #1: Manually Migrate Data from DynamoDB to Snowflake
- Method #2: Move Data from DynamoDB to Snowflake Using DynamoDB Stream
- Method #3: Load Data from DynamoDB to Snowflake Using SaaS Tools
Method #1: Manually Migrate Data from DynamoDB to Snowflake
Manually migrating data from DynamoDB to Snowflake involves several steps. What follows is a step-by-step guide. But first, here are the prerequisites required:
- An active AWS account with access to DynamoDB tables.
- An active Snowflake account with the target database.
Step 1: Extract Data from DynamoDB
To extract data from DynamoDB, you can use the AWS Management Console or AWS CLI.
Using the console:
- Log in to your AWS Management Console.
- Navigate to the DynamoDB service and select the table from where you want to export data. Now, choose the Operation Builder tab.
- In Operation Builder, create a scan or query operation based on your requirements. Add filters, conditions, and attributes that you need while exporting data.
- In the Result tab, select Export to CSV.
- Specify the filename and location to store the CSV file and click Save.
- The data, exported from the DynamoDB table in the CSV file format, will now be saved in your local system.
Using the CLI:
- Install and configure AWS CLI with your AWS credentials.
- Now, you can use the aws dynamodb scan command in the CLI to retrieve data from the DynamoDB table. Make sure you specify the desired output format as CSV or JSON in the output flag.
plaintextaws dynamodb scan --table-name Employee_data --output csv > output.csvIn the following command, Employee_data is the DynamoDB table name and output.csv is the output CSV file name. The data will be saved in the output.csv in your local system.
- Clean and enrich the CSV file data as per the requirements.
Step 2: Store Data in an Amazon S3 Bucket
Next, you’ll need to move the CSV files to the Amazon S3 bucket. There are two ways to do this:
Using the console:
- Choose an existing Amazon S3 bucket or create one in your AWS account. Need help? Refer to this documentation.
- After selecting or creating a S3 bucket, create a new folder in the bucket.
- Navigate to that specific folder and click the Upload button.
- In the Upload dialog, choose Add Files and select the CSV files from your local machine.
- Configure other settings as needed, such as metadata and permissions.
- Click the Start Upload button to initiate uploading the CSV file to the selected S3 bucket.
Using the CLI:
- You can use the aws s3 cp command in AWS CLI to copy CSV files data to your S3 bucket. Here’s an example of the command:
plaintextaws s3 cp “local_file_path/output.csv” s3://bucket_name/folder_nameReplace the local_file_path/output.csv with the local path of your CSV file and bucket_name/folder_name with the name and path of your S3 bucket.
Step 3: Copy Data to Snowflake
Now, your DynamoDB data is stored in the S3 bucket as CSV files.
- To upload CSV files into the Snowflake table, log into your Snowflake account.
- In Snowflake, an external stage refers to the location where the data files are stored or staged, such as the S3 bucket. You’ll need to create an external stage that points to your S3 bucket. To create an external stage, navigate to the Worksheet tab, where you can execute SQL queries and commands.
plaintextCREATE OR REPLACE EXTERNAL STAGE <stage_name>
URL = 's3://<bucket_name>/<path>'
St=TORAGE PROVIDER = S3
CREDENTIALS = ( AWS_KEY_ID = '<aws_key_id>' AWS_SECRET_KEY = '<aws_secret_key>' )
FILE_FORMAT = CSV;
Replace stage_name with the name you want to give to your external stage and make sure the URL points to the location where data files are stored in the S3 bucket. Specify the AWS credentials and file format as CSV.
- Use the existing target Snowflake table or create one using the SQL statements.
- With the stage and target table in place, you can now use the COPY INTO command to load data from the S3 stage into your Snowflake table. Here’s an example:
plaintextCOPY INTO target_table
FROM @stage_name/folder_name
FILE_FORMAT = (TYPE = CSV);
Replace target_table with the name of your Snowflake target table, @stage_name with the name of your Snowflake external stage pointing to the S3 bucket, and folder_name with the specific folder path within your S3 bucket where the CSV files are located.
- After executing the above command, the CSV file data from the S3 bucket will be loaded into the Snowflake target table.
- You can use Snowpipe, an automated data ingestion tool from Snowflake, to load data from S3 into Snowflake tables. The tool will automatically detect new files stored in the S3 and store them in the specified Snowflake table. After creating an external stage, run the following query to create a Snowpipe:
plaintextCREATE OR REPLACE PIPE snowpipe_name
AUTO_INGEST = TRUE
AS
COPY INTO target_table
FROM @stage_name/folder
FILE_FORMAT = (FORMAT_NAME = CSV);
Replace snowpipe_name with the preferred name, target_table with the Snowflake destination table, and @stage_name/folder with the path of your data in the external stage.
That’s it! You’ve successfully completed the DynamoDB to Snowflake ETL process manually. Congratulations.
While the manual process can help with data migration, it involves numerous steps and can be time-consuming and labor-intensive. In addition, it also necessitates a certain level of technical expertise in handling S3 and Snowflake services.
Unfortunately, these requirements can sometimes act as a barrier, slowing down the migration process. These complexities can also lead to delays in achieving real-time updates and efficient data replication.
Method #2: Move Data from DynamoDB to Snowflake Using DynamoDB Stream
Not keen on migrating data manually? You might want to use DynamoDB Stream.
To do that, you must enable Stream for the table you want to migrate and write code in the Lambda function. Here’s how to do it:
- Enable DynamoDB Stream: In the AWS Management Console, navigate to the DynamoDB service and select the table you want to replicate. Go to the Overview tab and enable the Stream.
- Create an external stage: Create an external stage in Snowflake to store data from the S3 bucket. You can refer to Step 3 of Method #1.
- Configure the Lambda function: Create and configure the Lambda function using the AWS Lambda service. In the Lambda function, write and execute the code to fetch DynamoDB data and export it into your S3 bucket. This can also include converting the data into CSV or JSON file format, depending on your Snowflake stage setup.
- Load Data into Snowflake: Use the COPY INTO command to load data from the external stage to the Snowflake target table.
While it does help automate data movement, it requires coding.
Method #3: Load Data from DynamoDB to Snowflake Using SaaS Tools
Looking for another option? You’re in luck.
SaaS platforms provide an intuitive user interface, reducing the need for extensive technical knowledge or coding skills. As such, these platforms are accessible to a wide range of users.
Estuary Flow is one such SaaS alternative that can automate DynamoDB to Snowflake data migration, saving time and effort compared to manual methods. This enhances operational efficiency and reduces the risk of errors.
With its change data capture (CDC) capabilities, Flow ensures real-time synchronization between DynamoDB and Snowflake, allowing you to maintain up-to-date data across both platforms. This means that any changes made in DynamoDB are promptly reflected in Snowflake, eliminating data discrepancies and creating a single source of truth, which enables timely insights.
Here's a step-by-step guide to set DynamoDB to Snowflake data pipeline using Estuary Flow. But before proceeding, let’s understand the prerequisites:
- One or more DynamoDB tables with DynamoDB streams enabled.
- A Snowflake account that includes a target database, a user with appropriate permissions, a virtual warehouse, and a predefined schema.
- Snowflake account's host URL.
Step 1: Signup or Login
- To create a DynamoDB to Snowflake data pipeline, log in to your Estuary Flow account or create one for free.
Step 2: Connect and Configure DynamoDB as Source
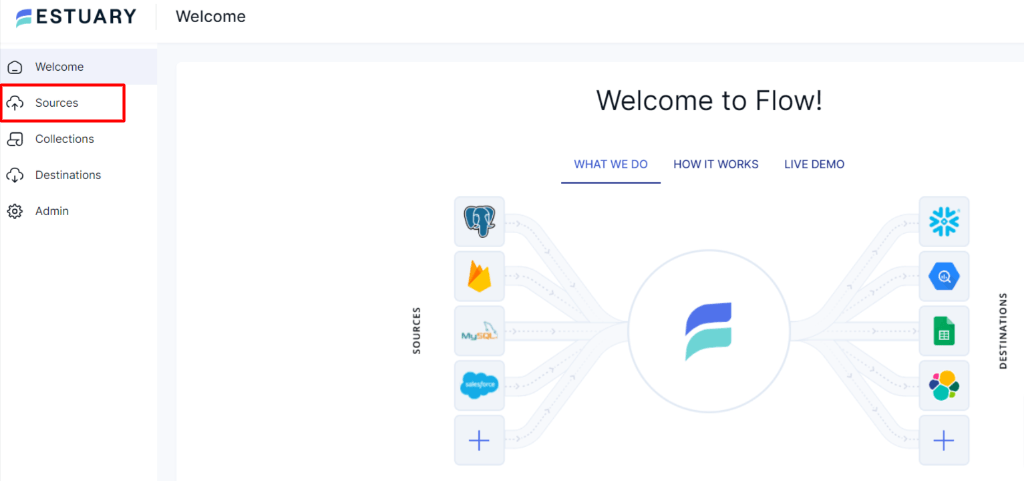
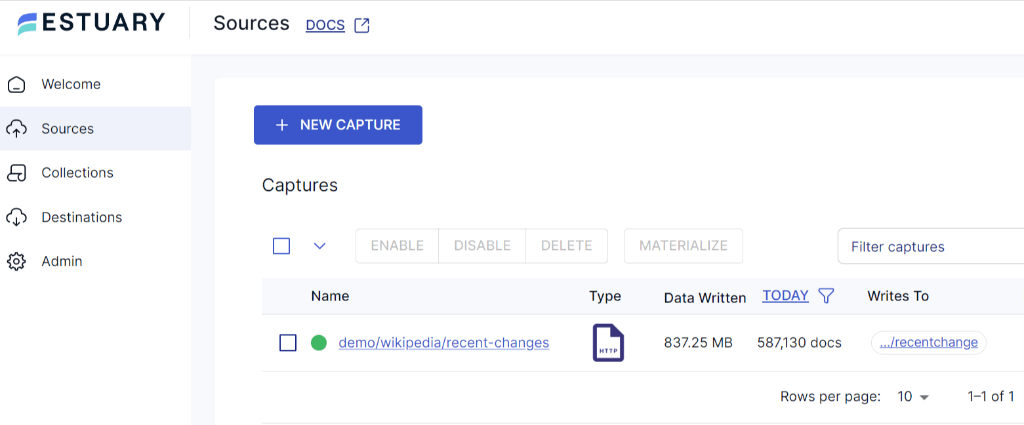
- After logging in, you’ll land on Estuary’s dashboard. To connect DynamoDB as the source of your data pipeline, locate and select Sources on the left-hand side of the dashboard.
- Click the + New Capture button on the Sources page.
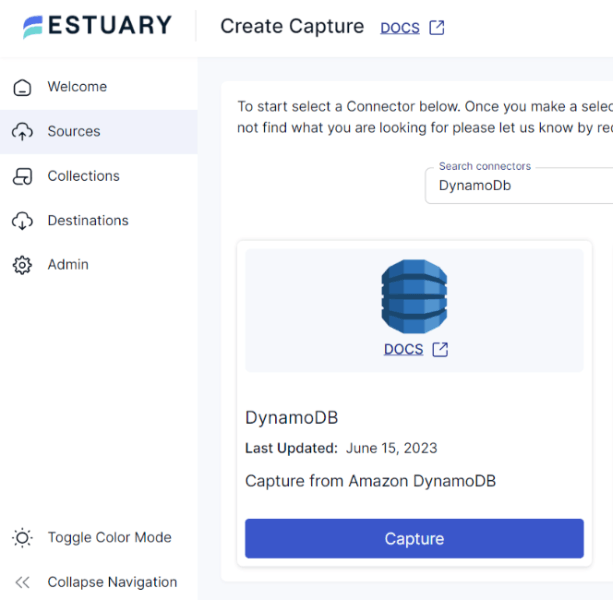
- You’ll be directed to the Create Capture page and search for the DynamoDB connector in the Search Connector Box.
- Click the Capture button.
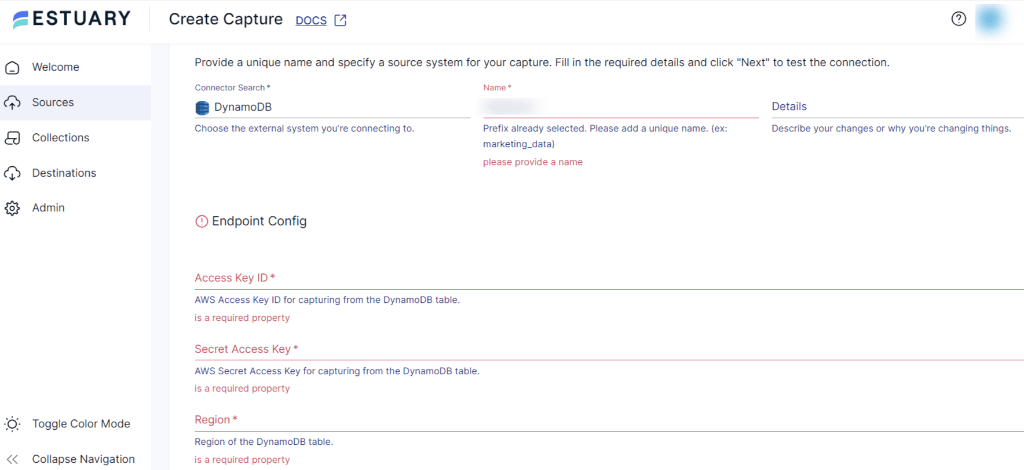
- Now, the DynamoDB Create Capture page will appear. Provide a unique name for your connector and mention the source system for your capture. Fill in the Endpoint Details, such as Access Key ID, Secret Access Key, and Region.
- Once you fill in all the details, click Next and test your connection. Then click Save and Publish.
Step 3: Connect and Configure Snowflake as Destination
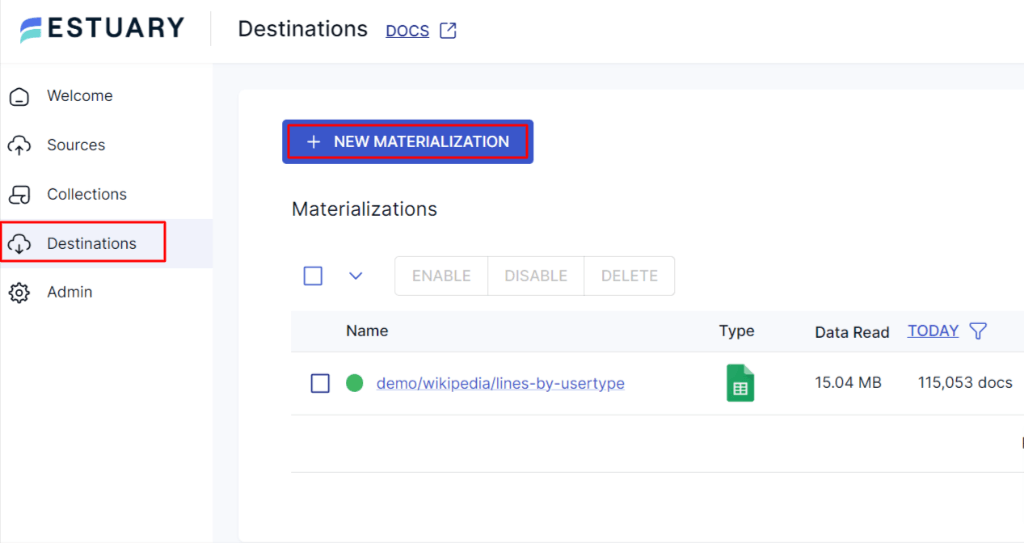
- Navigate back to the Estuary dashboard to connect Snowflake as the destination of your data pipeline. Locate and select Destinations on the left-hand side of the dashboard.
- Click the + New Materialization button on the Destinations page.
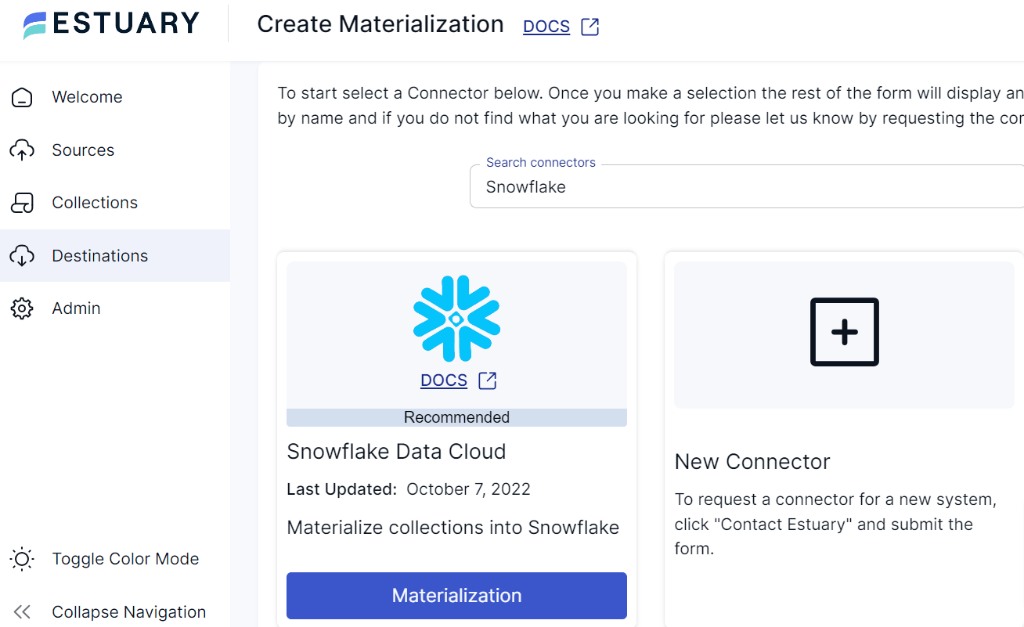
- You’ll be directed to the Create Materialization page. Search for the Snowflake connector in the Search Connector Box.
- Click the Materialization button.
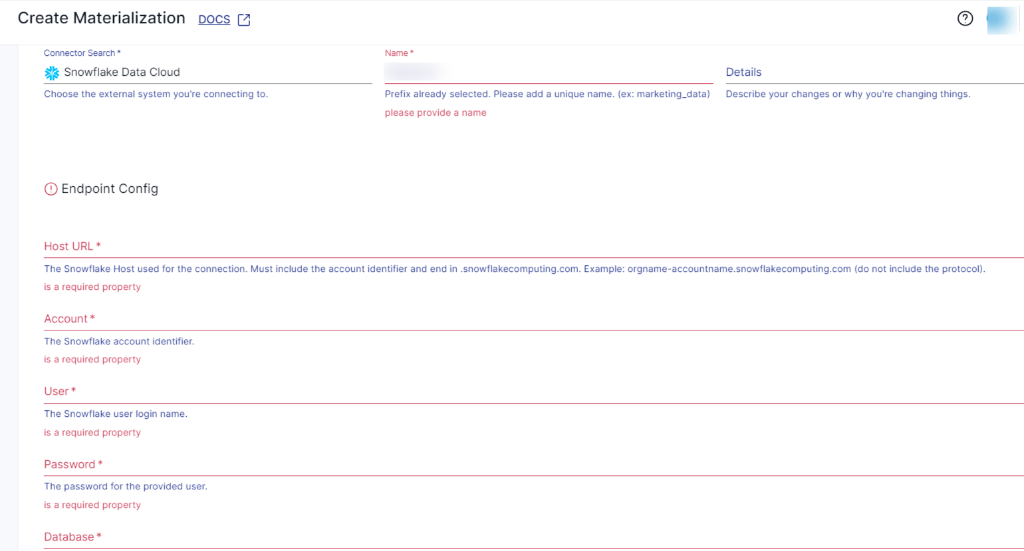
- On the DynamoDB Create Capture page, provide a unique name for your connector and mention the destination system for your materialization. Fill in the Endpoint Details, such as Snowflake Account identifier, User login name, Password, Host URL, SQL Database, and Schema information.
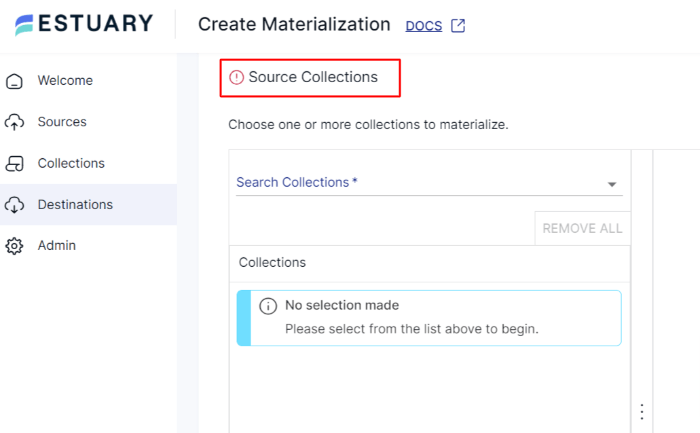
- You can also choose the collections you want to materialize into your Snowflake database from the Source Collection section.
- After filling in all the details, click Next and proceed by clicking Save and Publish. Estuary Flow will now establish a connection between DynamoDB and Snowflake with these two simple steps.
For a comprehensive guide on how to create a complete flow, follow Estuary’s documentation:
Benefits of Using Estuary Flow
- Pre-built Connectors: Estuary Flow provides 200+ connectors covering a wide range of sources and destinations. These connectors include popular databases, warehouses, APIs, and more.
- Data Synchronization: Flow efficiently synchronizes data across multiple destinations, ensuring both data accuracy and the availability of real-time information across platforms.
- No-code Solution: With its user-friendly interface and pre-built connectors, you can design, configure, and automate data integration workflows without extensive coding expertise.
Conclusion
Since you’ve made it this far, you’ve learned about three different approaches you can use to complete the DynamoDB to Snowflake data integration process.
Ultimately, choosing the right solution depends on your specific use case and requirements. While the first approach requires human intervention and suits small data transfers, the second method uses DynamoDB Stream and demands coding expertise for scripting.
On the other hand, SaaS alternatives like Estuary Flow help you overcome the limitations of those methods, providing an automated, low-code solution that facilitates the data migration process in just two steps.
Flow’s CDC capabilities ensure your target table is always up to date and ready for analysis. As a result, you can efficiently manage and synchronize data between DynamoDB and Snowflake — ensuring access to the actionable insights you need the moment you need them.
Looking for a simple and reliable solution to migrate DynamoDB to Snowflake? Take Estuary Flow for a test drive today.
Are you interested in moving your DynamoDB to other destinations? Check out these comprehnsive guides:

About the author
With over 15 years in data engineering, a seasoned expert in driving growth for early-stage data companies, focusing on strategies that attract customers and users. Extensive writing provides insights to help companies scale efficiently and effectively in an evolving data landscape.
Popular Articles


