Customer satisfaction is crucial for businesses and is often considered one of the most critical factors for their growth and success. Enterprises that constantly prioritize customer satisfaction can gain a competitive edge in the crowded marketplace. By recognizing the pivotal role of customer satisfaction, enterprises are increasingly turning to robust data integration solutions and streamlined pipelines for faster, higher-quality analytics.
Seamless migration of data from Braze to Snowflake is an example of a powerful integration that allows you to centralize customer engagement data and other business-critical information. With such detailed analysis, you can gain an in-depth understanding of customer behavior and preferences, leading to increased customer satisfaction.
Let’s look at the different methods for moving data from Braze to Snowflake after a brief overview of both platforms.
What Is Braze?
Formerly known as Appboy, Braze is a customer engagement platform for multi-channel marketing. It helps you create personalized customer experiences with targeted marketing campaigns.
The primary focus of Braze is to deliver relevant and timely messages to users across multiple communication channels. This includes email, push notifications, SMS, in-app messaging, and more. With this multi-channel approach, you can ensure that messages reach users on their preferred platforms, thereby enhancing the feasibility of engagement.
You can use Braze’s robust personalization capabilities to tailor messages based on user behavior, preferences, demographics, and past interactions. Such personalized messaging campaigns can span the entire customer journey, from onboarding and retention to churn prevention. You can also include real-time recommendations, product suggestions, and customized offers to enhance the relevance of the messages.
An impressive feature of Braze is that it supports real-time triggers based on user actions. You can send messages immediately after a user makes a purchase, abandons a cart, etc.
What Is Snowflake?
Launched in October 2014, Snowflake is a cloud data platform extended to handle a range of workloads, including Data Warehousing, Data Lakes, Data Engineering, and Data Science. Snowflake supports multiple cloud providers, including Google Cloud, AWS, and Azure.
The architecture of Snowflake is designed with separate storage and compute layers. This results in efficient resource allocation and cost optimization, requiring you to only pay for what you use. An additional benefit of separate storage and compute layers is reduced latency associated with data movement between the layers, resulting in faster query performance.
One of the key features of Snowflake is its capability to clone data from a database, schema, or table without requiring additional storage. The cloned object is separate from the source of the clone and can be written to. The cloned data doesn’t consume any storage until changes are made to the cloned object. This is a useful feature for organizations where real-time data must be copied from production to development or staging environments to change the object.
4 Ways to Move Data from Braze to Snowflake
Choose the method that best suits your needs to load data from Braze to Snowflake, from simple no-code solutions to customizable scripts. Streamline your data integration process and make the most of your valuable Braze insights.
- Method #1: Using Snowflake Secure Data Sharing
- Method #2: Using No-Code Tools like Estuary Flow
- Method #3: Using CSV Files Export/Import
- Method #4: Using Custom Scripts
Method #1: Using Snowflake Secure Data Sharing to Load Data From Braze to Snowflake
You can use Secure Data Sharing for a Braze to Snowflake integration. Snowflake’s Secure Data Sharing functionality allows you to share selected objects in a database in your account with other Snowflake accounts.
You can share tables, external tables, materialized views, or user-defined functions (UDFs). The sharing of databases is accomplished through shares, which are Snowflake objects that contain all of the information required to share a database.
It is important to note that no data is actually transferred or copied between the accounts. So, the shared data doesn’t take up any storage space in your account or contribute to data storage charges. The associated costs are only for the compute resources required to process and analyze the data.
To use the Braze-Snowflake integration, you will need a Braze account and a Snowflake account (with admin-level permissions). When a data share is requested using Snowflake Data Share, Braze will provision the share. After the share is provisioned, all data will be immediately accessible from within your Snowflake instance as an incoming data share.
When the share is visible in your instance, you must create a database from the share to view and query the tables.
Method #2: No-Code Tools Like Estuary Flow to Move Data From Braze to Snowflake
No-code data integration platforms are an effective alternative to the time-consuming manual processes of moving data between platforms. Most no-code tools provide pre-built templates, drag-and-drop interfaces, and configuration wizards to simplify complex migration workflows.
Estuary Flow is a fully-managed no-code solution for real-time ETL (extract, transform, load) processes. It is designed to minimize latency in the data migration pipeline, ensuring data flow seamlessly. With a fault-tolerant architecture, Flow is built to withstand failures and ensure uninterrupted data streaming.
To use Estuary Flow for data migration, you must sign in to your account. However, if you don’t already have an Estuary account, register for your free account. After signing in, follow below-given steps to integrate Braze to Snowflake:
Step 1: Configure Braze as the Data Source
Prerequisites: You must have an account on Braze and provide the URL and REST API key during the connector setup. Read the prerequisites documentation for more information.
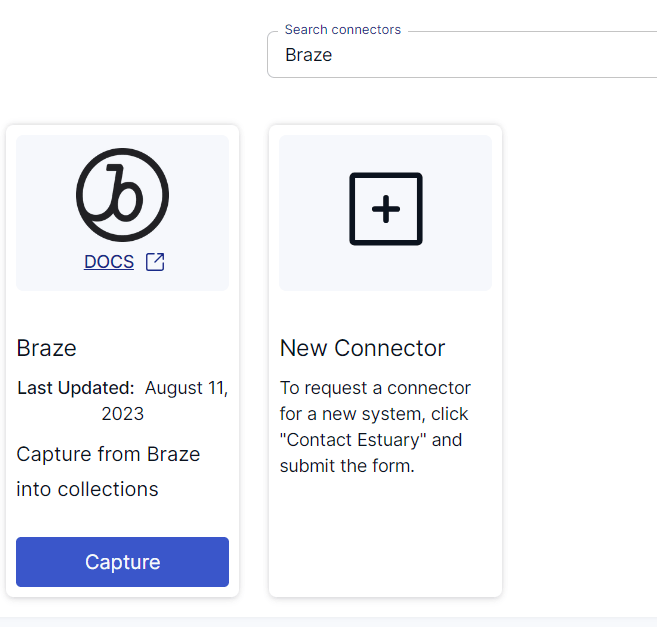
On the dashboard, navigate to Sources → + NEW CAPTURE. Search for Braze in the Search connectors box and click on Capture of the Braze connector in the search results.
Image Source: Estuary
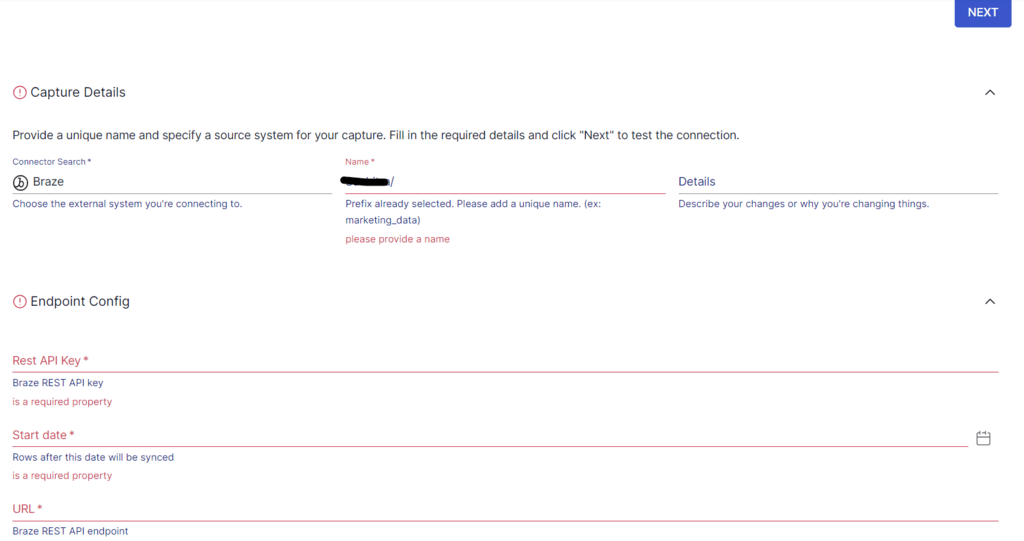
On the Braze connector page, specify the required details, such as a Name for the capture, REST API Key, Start date, and URL. After filling in these fields, click on NEXT. Then, click on SAVE AND PUBLISH.
Image Source: Estuary
The connector will capture data from Braze into Flow collections. Braze APIs support the following data resources:
- Campaigns
- Canvases
- Events
- Kpi_daily_new_users
- Kpi_daily_active_users
- Kpi_daily_app_uninstalls
- Cards
- Segments
By default, each resource is mapped through a separate binding to a Flow collection.
Step 2: Configure Snowflake as the Data Destination
To use the Snowflake connector, you must ensure the prerequisites are fulfilled.
Following a successful capture, a pop-up appears with the details of the process. Click on MATERIALIZE COLLECTIONS to proceed with setting up the destination end of the data migration pipeline. Alternatively, you can navigate to the Estuary dashboard and click on Destinations on the left-side pane.
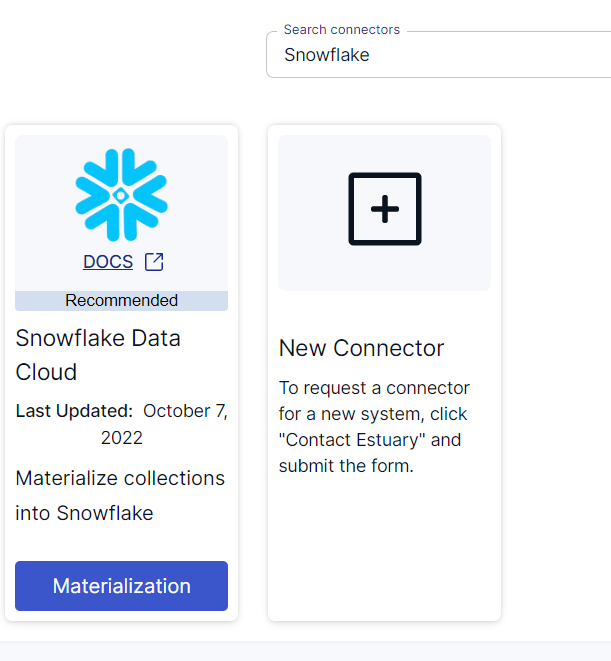
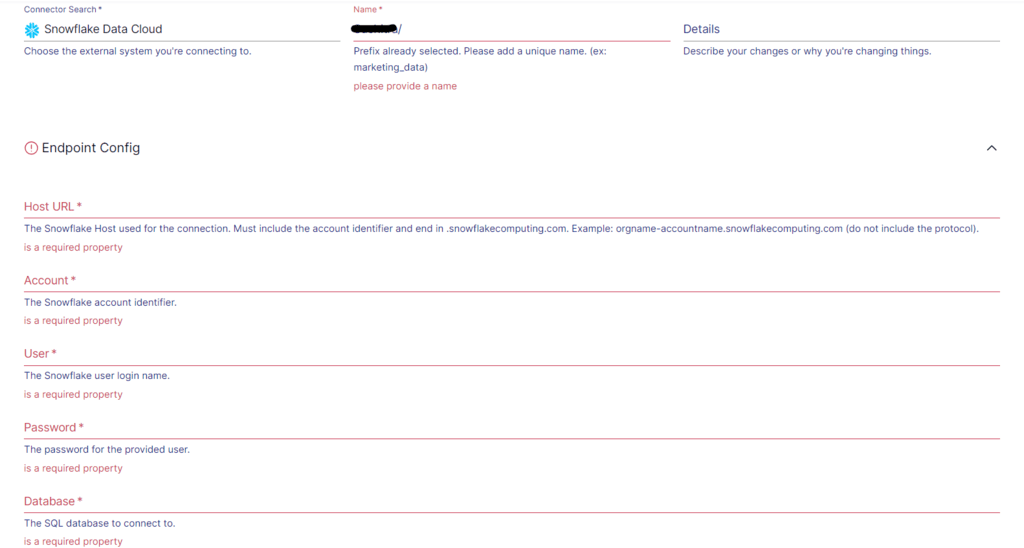
Click on the + NEW MATERIALIZATION button and search for Snowflake in the Search connectors box. When you see the Snowflake Data Cloud connector in the search results, click on its Materialization button.
Image Source: Estuary
On the Snowflake connector page, specify the required details, including a Name for the materialization, Host URL, Account, User, and Password. Then, click on NEXT. If your data captured from Braze wasn’t filled in automatically, use the Source Collections feature to manually add the data. Finally, click on SAVE AND PUBLISH.
Image Source: Estuary
The connector will materialize Flow collections into a Snowflake database. For more information on the process, refer to the Estuary documentation:
Method #3: Using CSV Files Export/Import for Braze-Snowflake Integration
You can export your data from Braze as CSV files and then load it into Snowflake tables. Braze provides export options for Campaign or Canvas results and Segment, Overview, Revenue, News Feed, and Custom Event data.
If you want to export campaign data, navigate to the Campaigns page of the Braze dashboard. Then, select the campaign you wish to view and scroll down to the historical performance graphs, which can be exported. Click on the export option, and the CSV file will be saved to your local machine.
Next, you can use Snowflake’s Classic Console or Snowsight to load data from files up to 50 MB in size into a Snowflake table. To load large files or a larger number of files, you can use SnowSQL, a command-line tool for connecting to Snowflake and executing SQL queries.
Method #4: Using Custom Scripts to Load Braze Data to Snowflake
You can use Braze’s export APIs to programmatically export data as a JSON file. Braze allows you to export data pertaining to campaigns, revenue, users, etc. Select the API endpoint or the data you want to export, then use CURL to provide your API request to the chosen endpoint. This will include an HTTP GET request to retrieve data from the API endpoint.
Here’s an example request to export Campaign details:
plaintextcurl --location -g --request GET 'https://rest.iad-01.braze.com/campaigns/details?campaign_id={{campaign_identifier}}' \
--header 'Authorization: Bearer YOUR-REST-API-KEY'
The exported data will be in JSON format. You can load this data into Snowflake using its bulk loading or streaming capabilities.
Note: Rate limits are applicable while using API to export data.
The Takeaway
Moving data from Braze to Snowflake benefits organizations in harnessing the full potential of their customer engagement data. The consequential benefits include deeper insights, improved decision-making, and personalized interactions.
To move data from Braze to Snowflake, you can use one of four different methods. This includes using Snowflake Secure Data Sharing, using CSV files export/import, using custom scripts, and using no-code tools.
If your organization relies on time-critical insights for crucial decision-making, automated data pipeline tools are a game changer. These no-code tools, like Estuary Flow, have an intuitive interface and in-built connectors to simplify the process of setting up robust data pipelines.
Estuary Flow allows seamless integration between popularly used data sources and destinations. It will only take a few minutes to set up and start the data migration. Register for a free Estuary account today and start building your first pipeline!

About the author
With over 15 years in data engineering, a seasoned expert in driving growth for early-stage data companies, focusing on strategies that attract customers and users. Extensive writing provides insights to help companies scale efficiently and effectively in an evolving data landscape.
Popular Articles


